18. Special Features
18.1. SmartPlates
SmartPlates dynamically highlights areas of an approach plate as you fly so that you can quickly and easily identify which phase of the approach you are in, and the relevant MSAs and minimas.
View the SmartPlates documentation on the Airfields Page to learn more!
18.2. Bullseye!
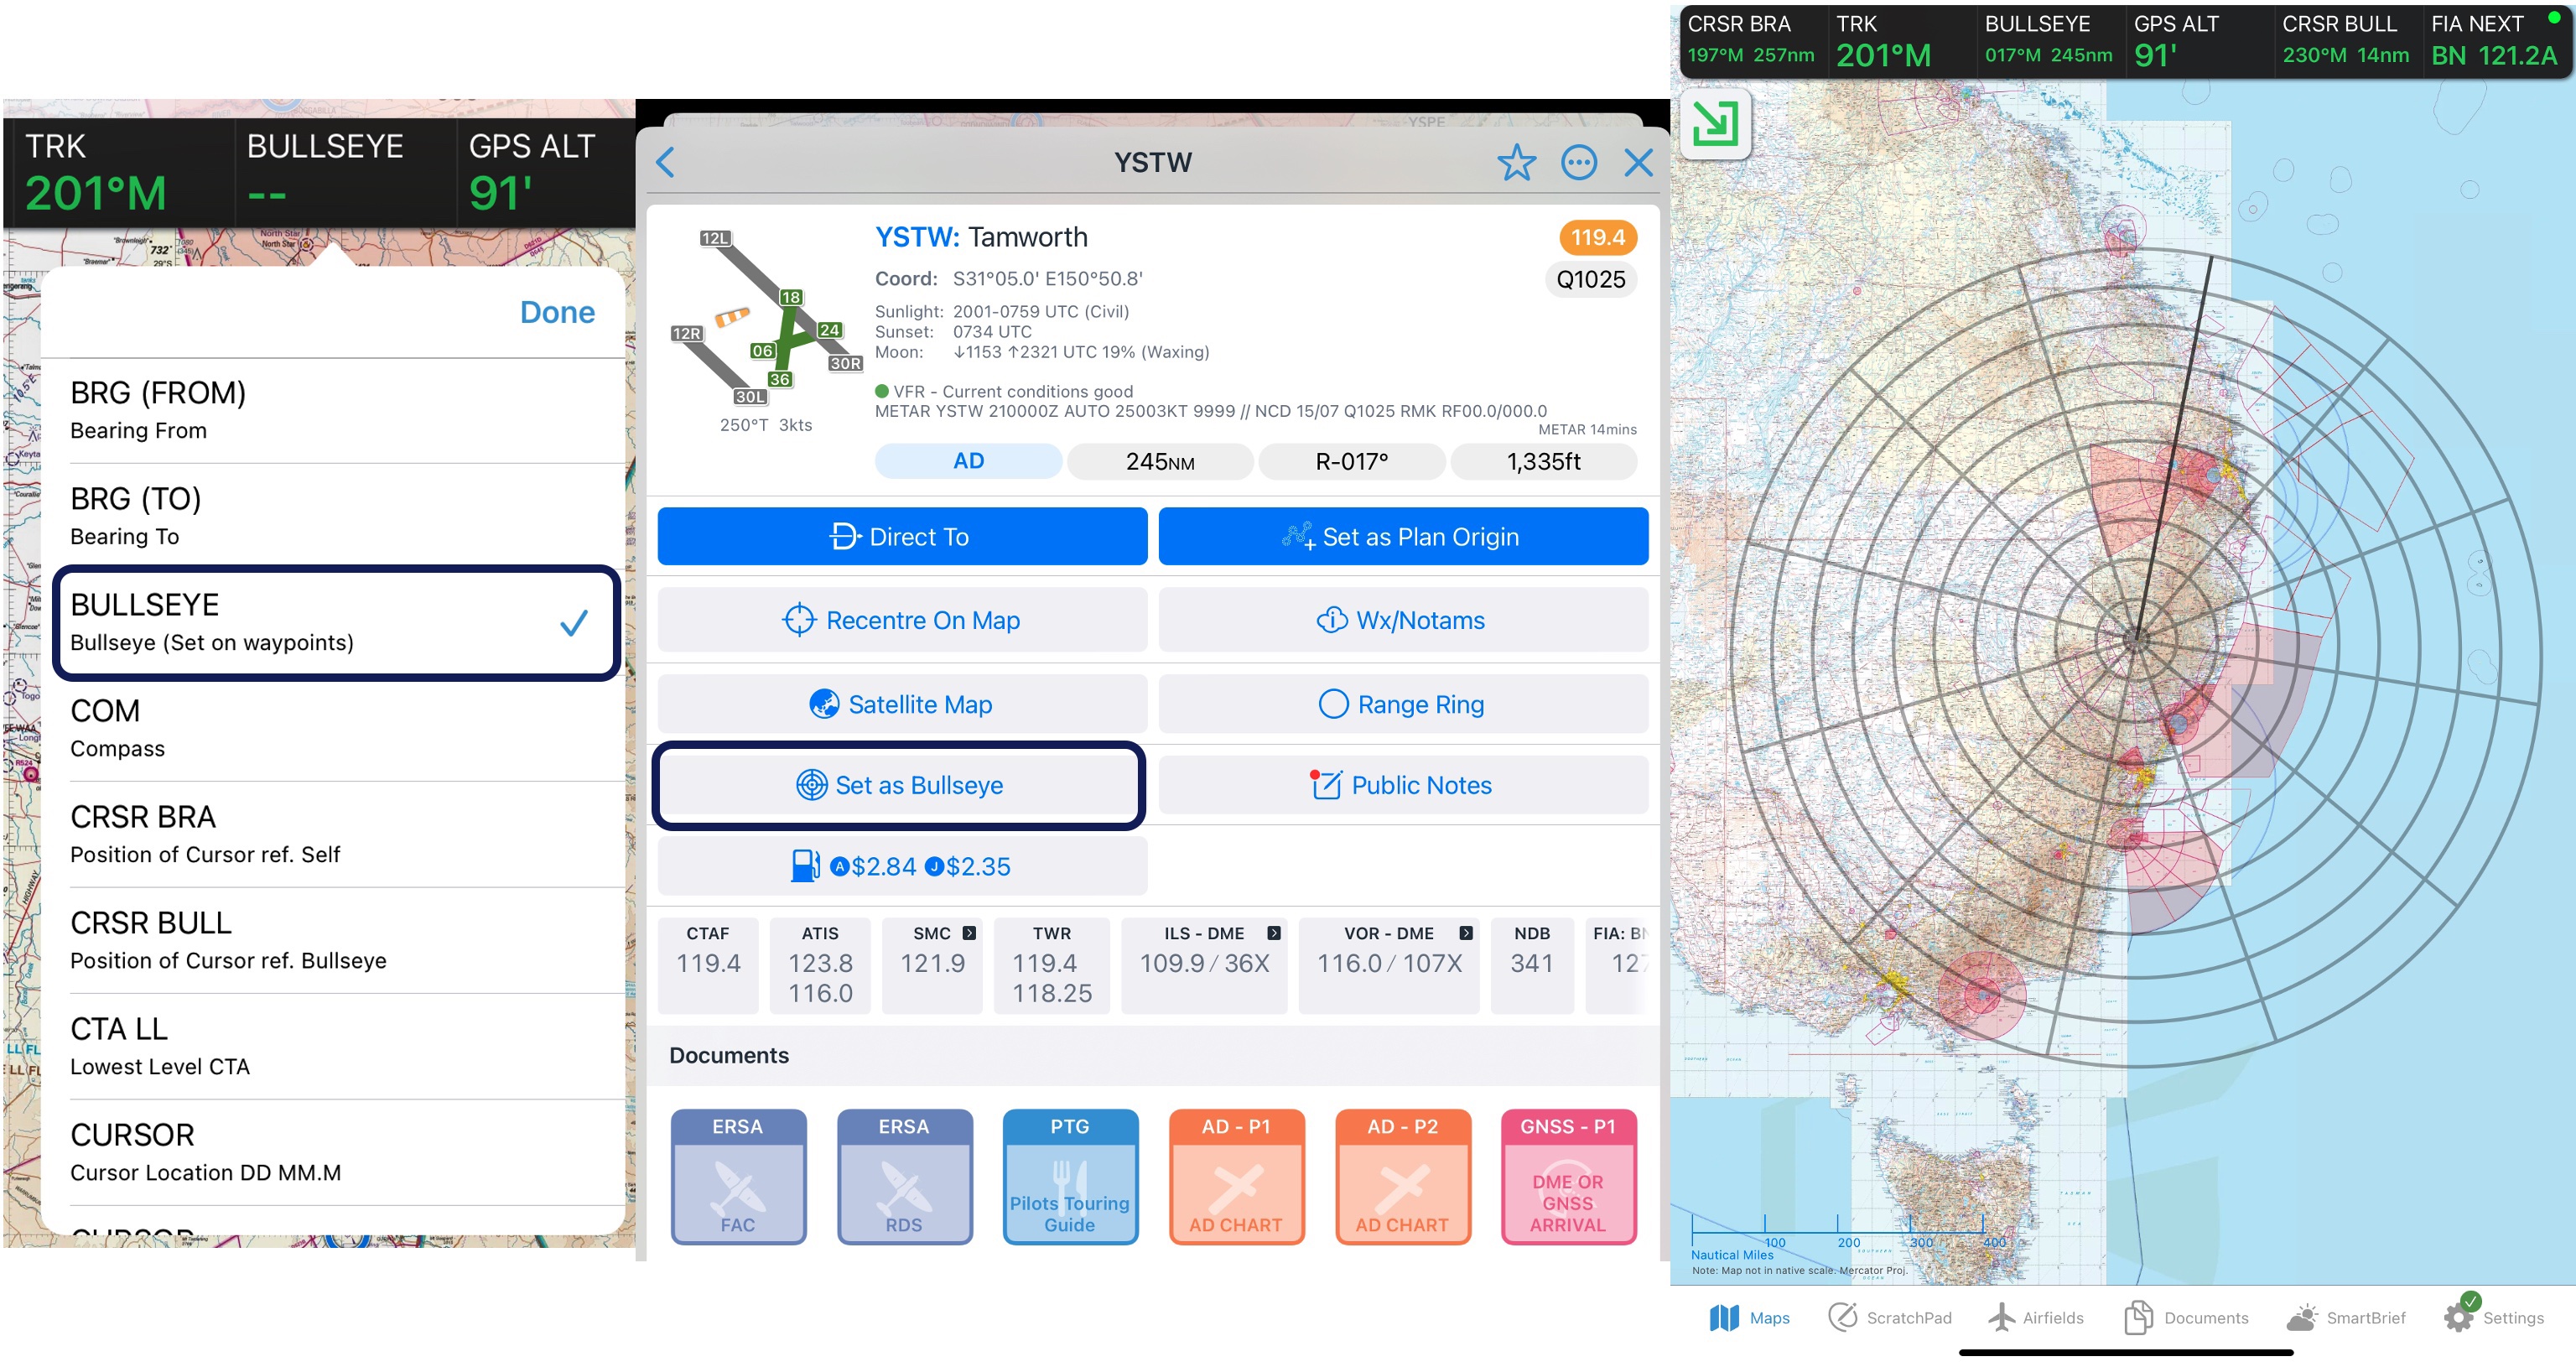
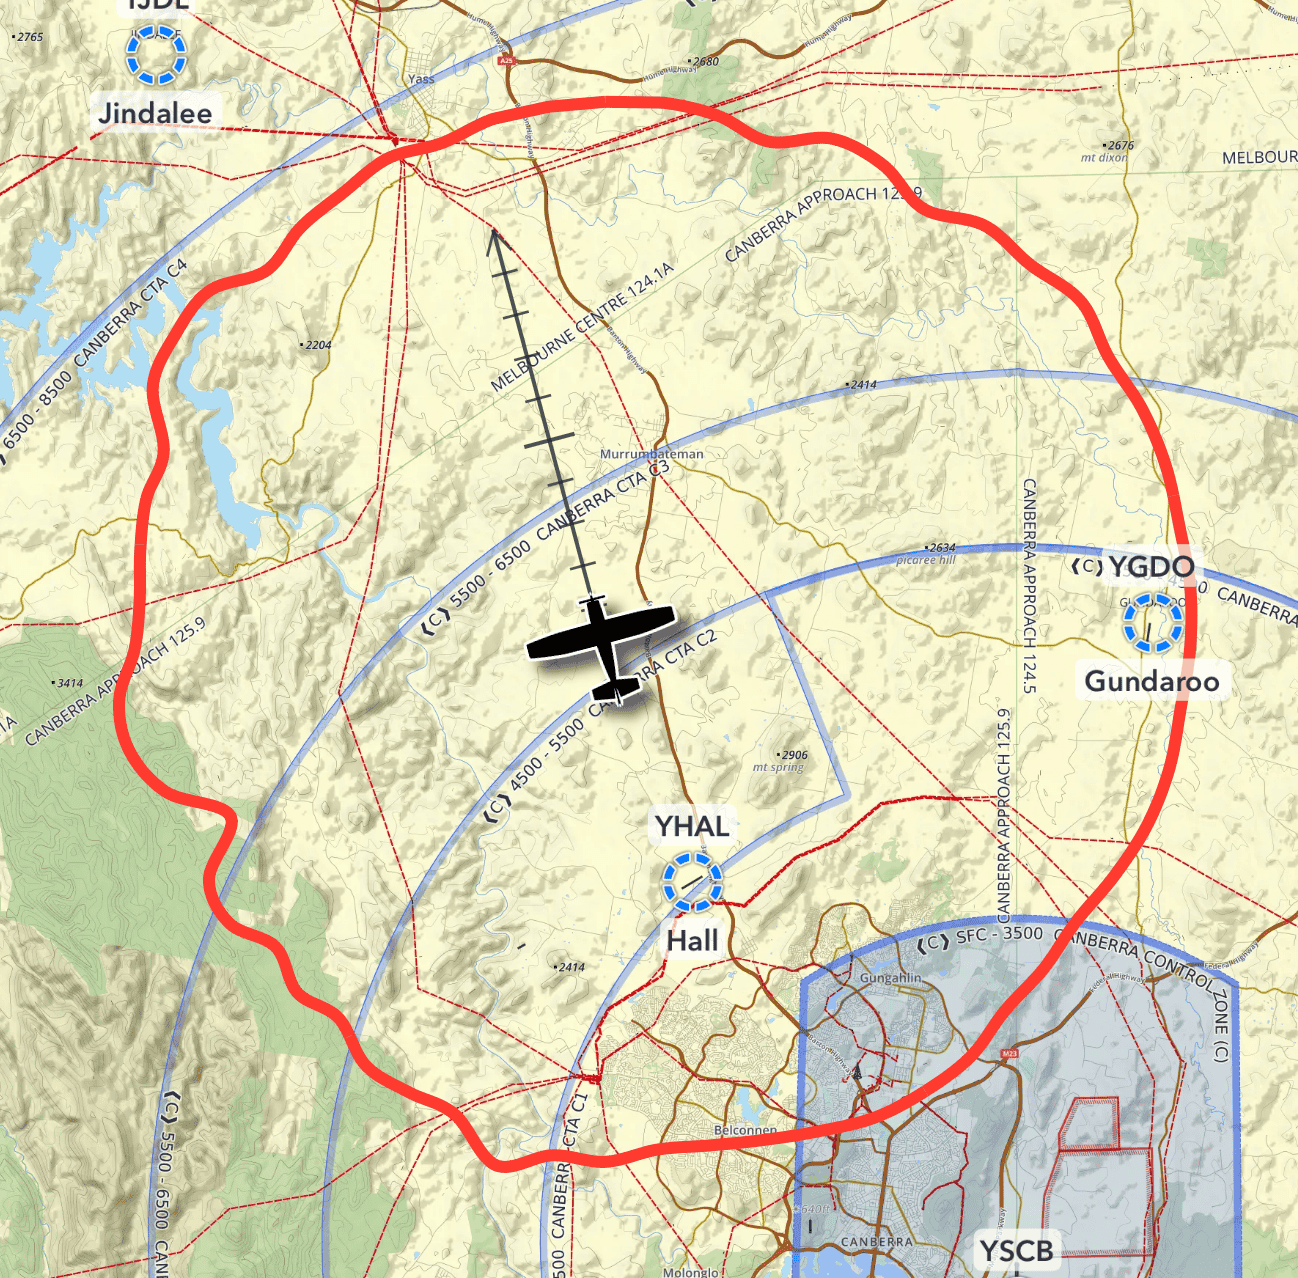
Image 18.1 Setting a Bullseye
The Bullseye feature is useful to both Military and General Aviation pilots; when added to the GPS HUD the Bullseye provides bearing and range information from your current position to the set Bullseye (BULLSEYE option in the HUD), from the Screen Cursor to the Bullseye (CRSR BULL in the HUD), and from your current position to the Screen Cursor (CRSR BRA).
To activate Bullseye:
Press and hold on one of the GPS HUD boxes and select ‘BULLSEYE’ in the resulting menu. Repeat for CRSA BRA and CRSR BULL if desired.
Set the Bullseye position by tapping on the map → tap on the desired waypoint in the Closest Points popup → tap ‘Set as Bullseye’.
Bullseye circles are scaled in 50NM increments, out to 500NM in degrees Magnetic (ºM). The circles correctly account for latitude scale variations at southern latitudes on Mercator projection maps. The Northern radial is darkened for reference. (NOAA worldwide magnetic model is used for calculating magnetic deviation - https://www.ngdc.noaa.gov/geomag/WMM/soft.shtml)
To disable Bullseye simply replace the BULLSEYE GPS HUD box with a different selection.
18.3. Range Rings
Range rings can be set on any waypoint. Tap near a waypoint on the map, select the waypoint in the resulting Closest Points popup, then tap ‘Range Ring’. Turn on the Show / Hide Range Ring toggle and select your distance and colour options. An example is shown below in Image 18.2.
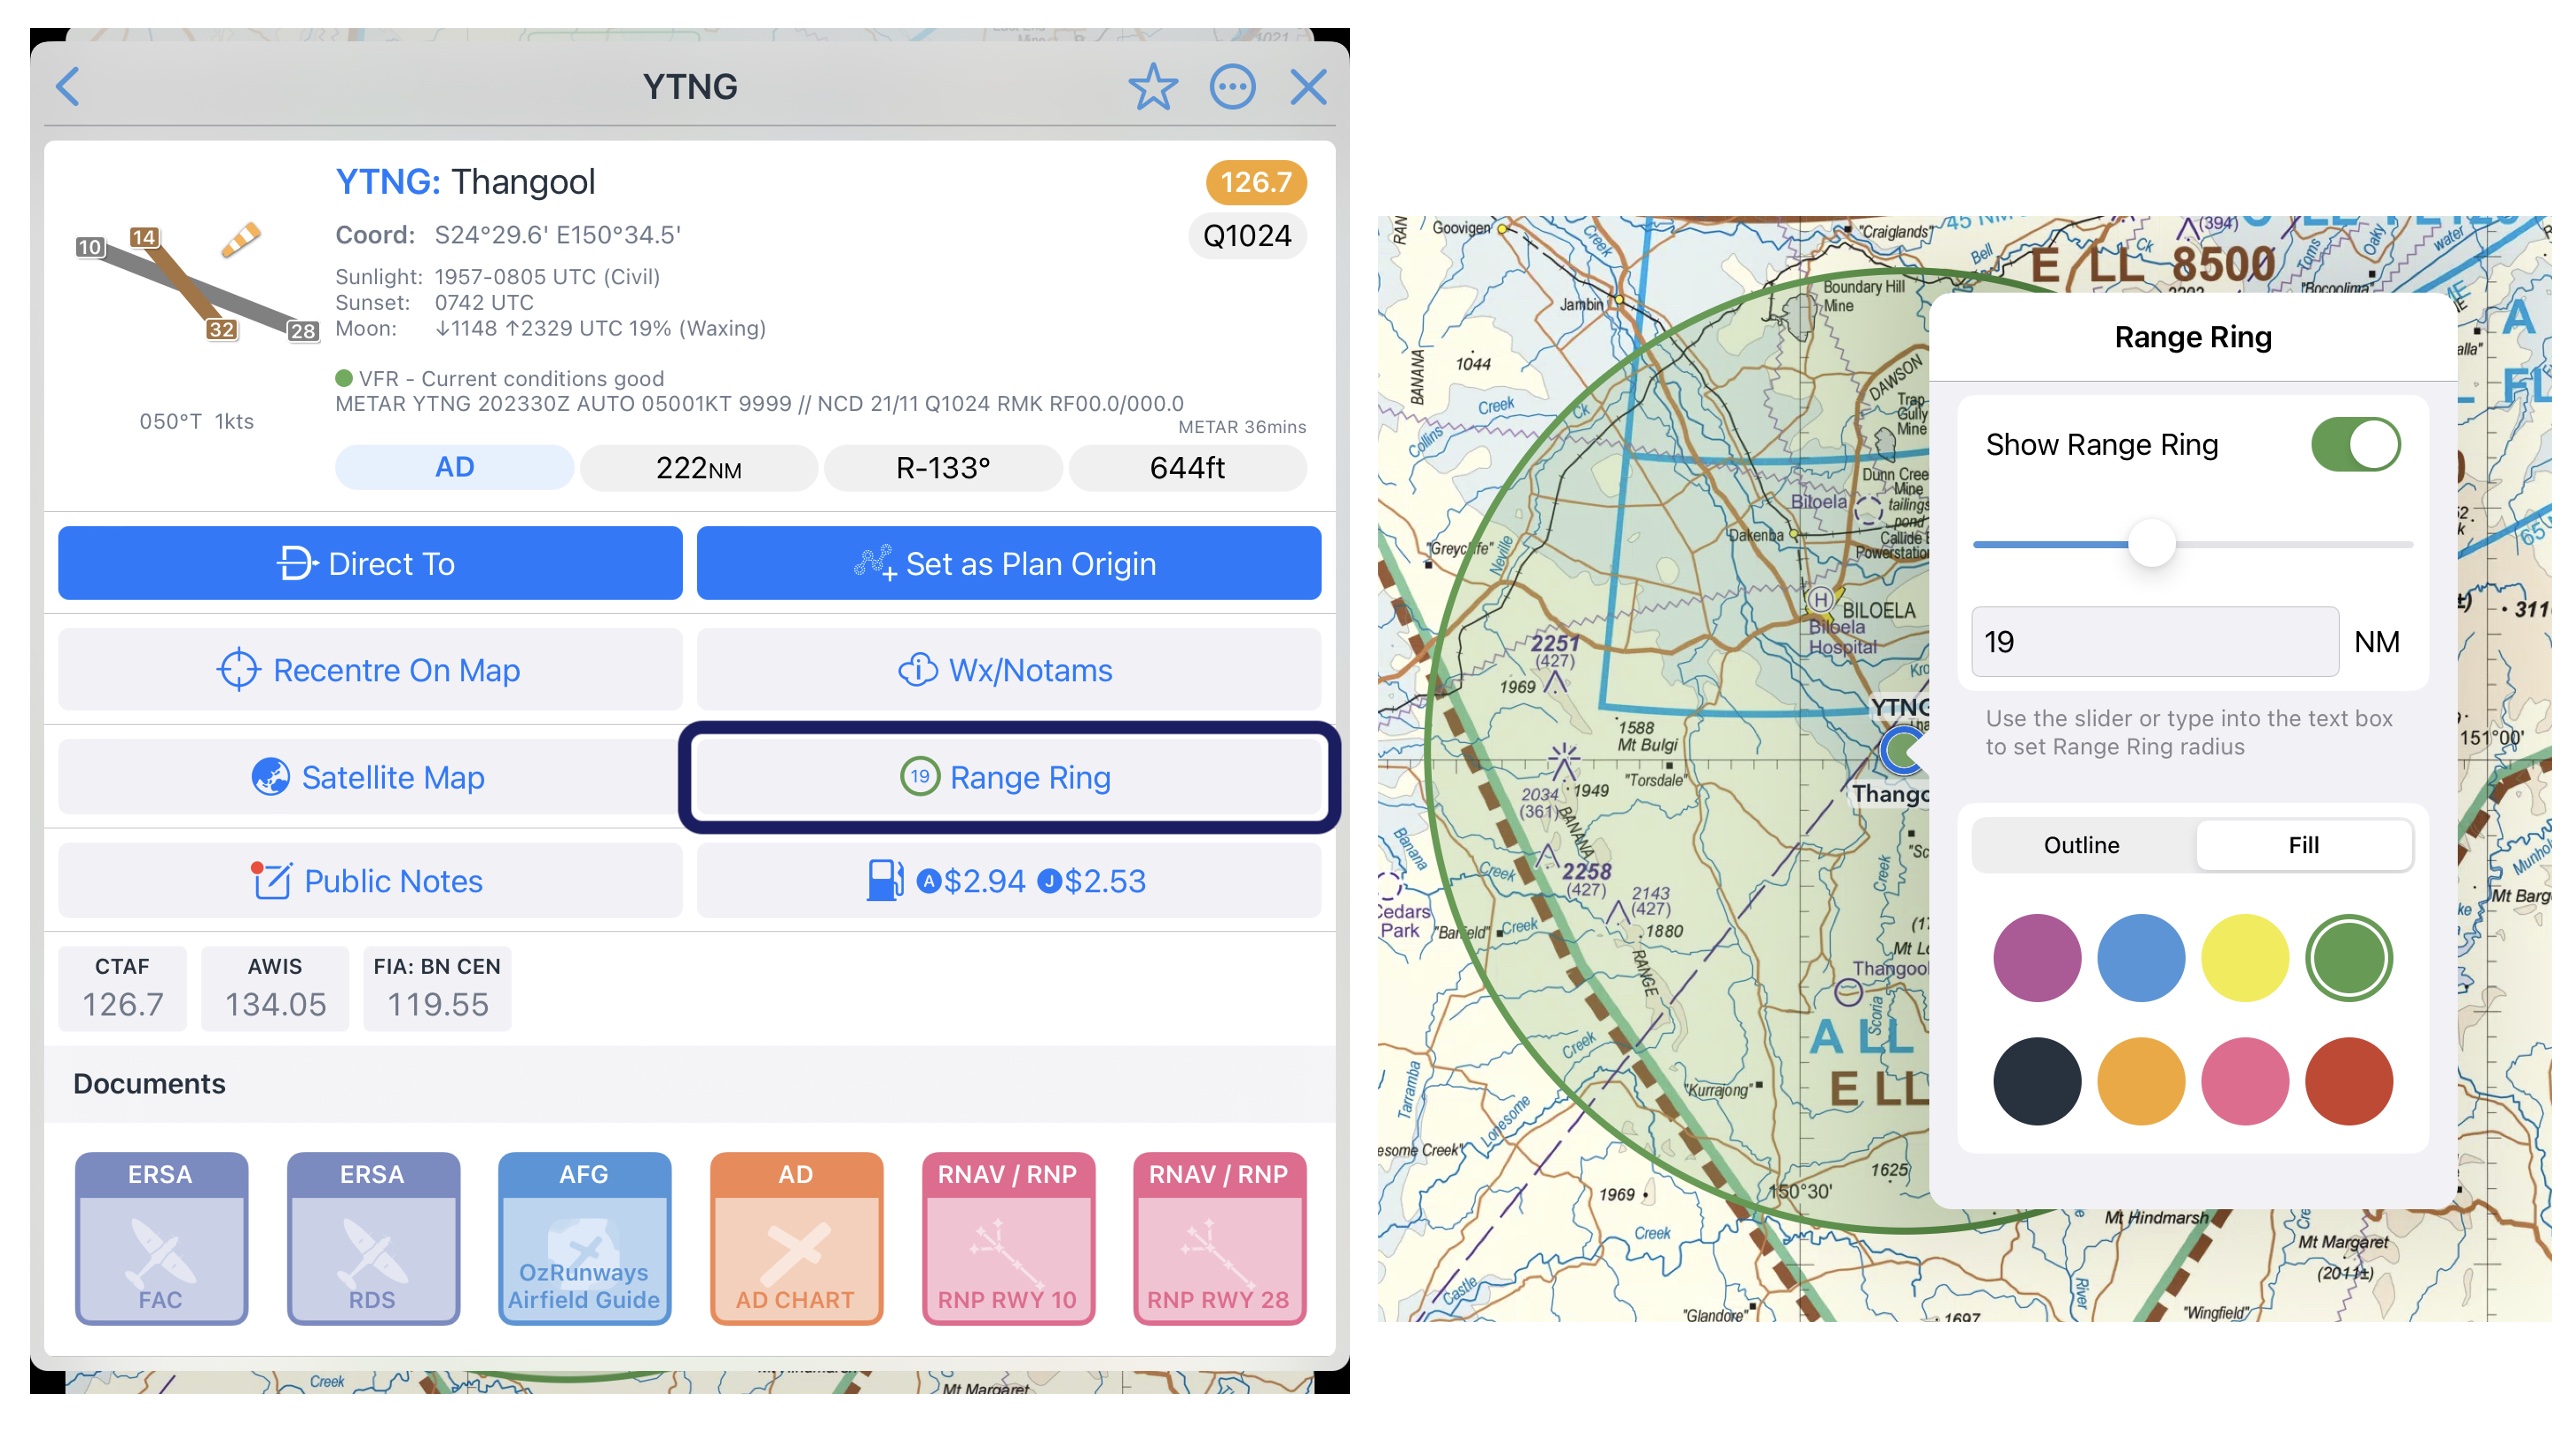
Image 18.2 Setting a Range Ring
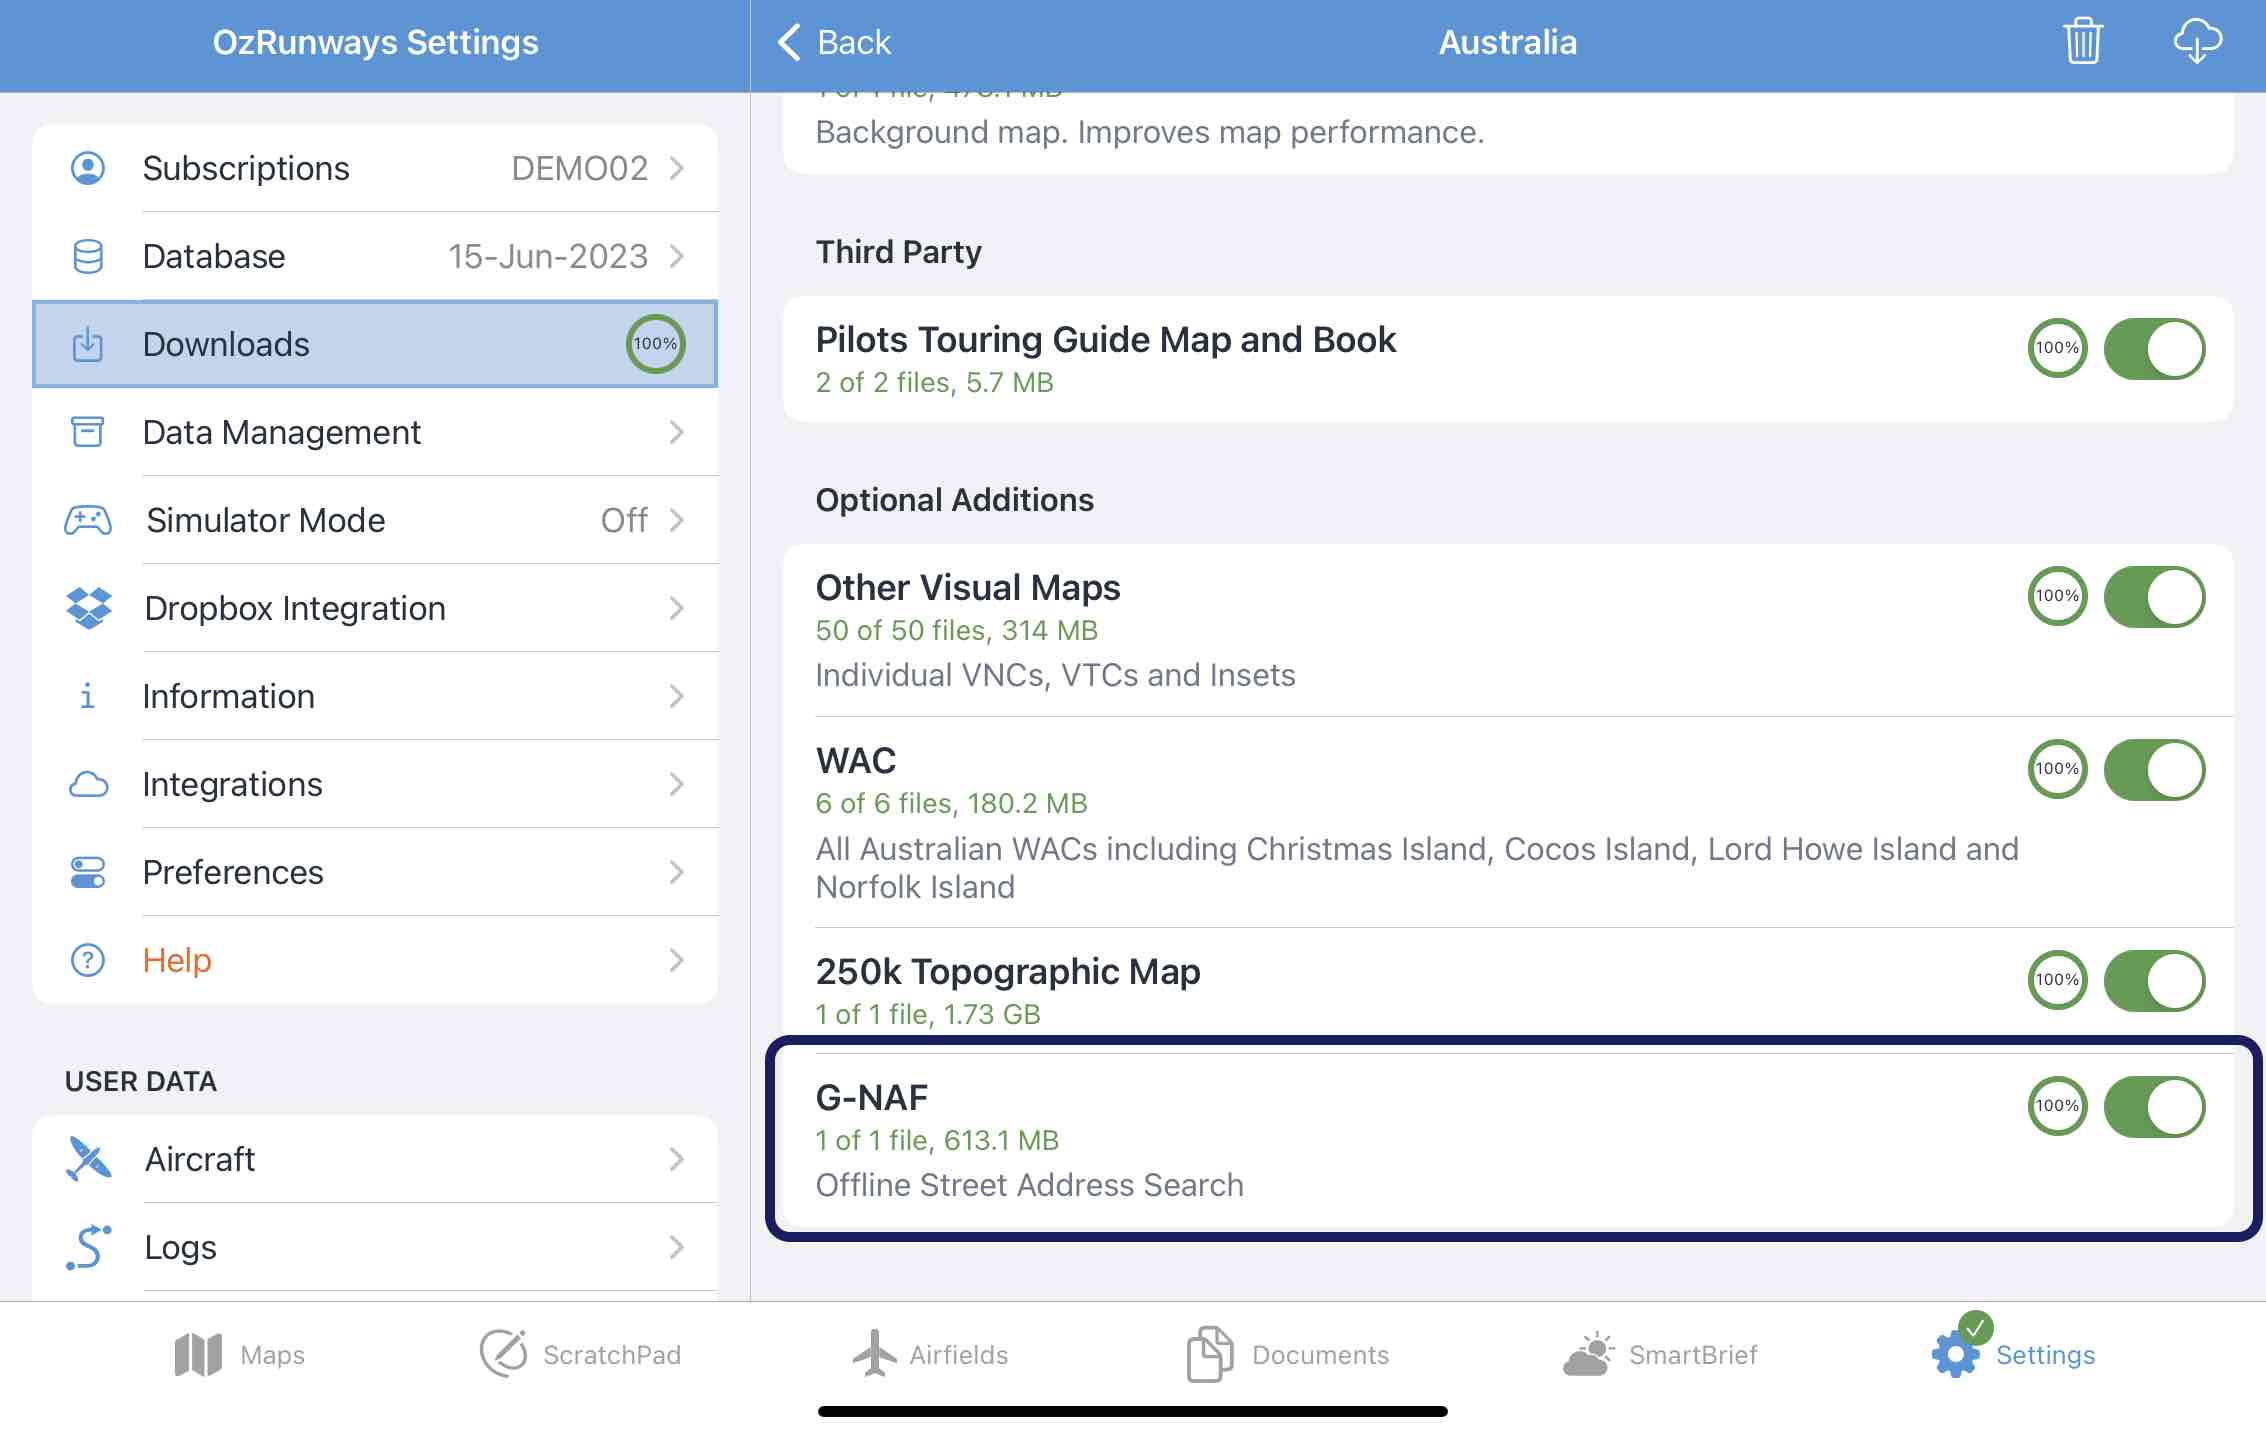
18.4. Offline Street Address Search
Note
Available in Australia only
This feature allows you to search for addresses or suburbs within Australia when you have no internet connection, within 300NM of your location.
Before using this feature you will first need to download the G-NAF (Geocoded National Address File) in Settings → Downloads → Australia → G-NAF
Once the G-NAF has finished downloading you can use the Search function on the Map Page to search for a street address, or suburb.
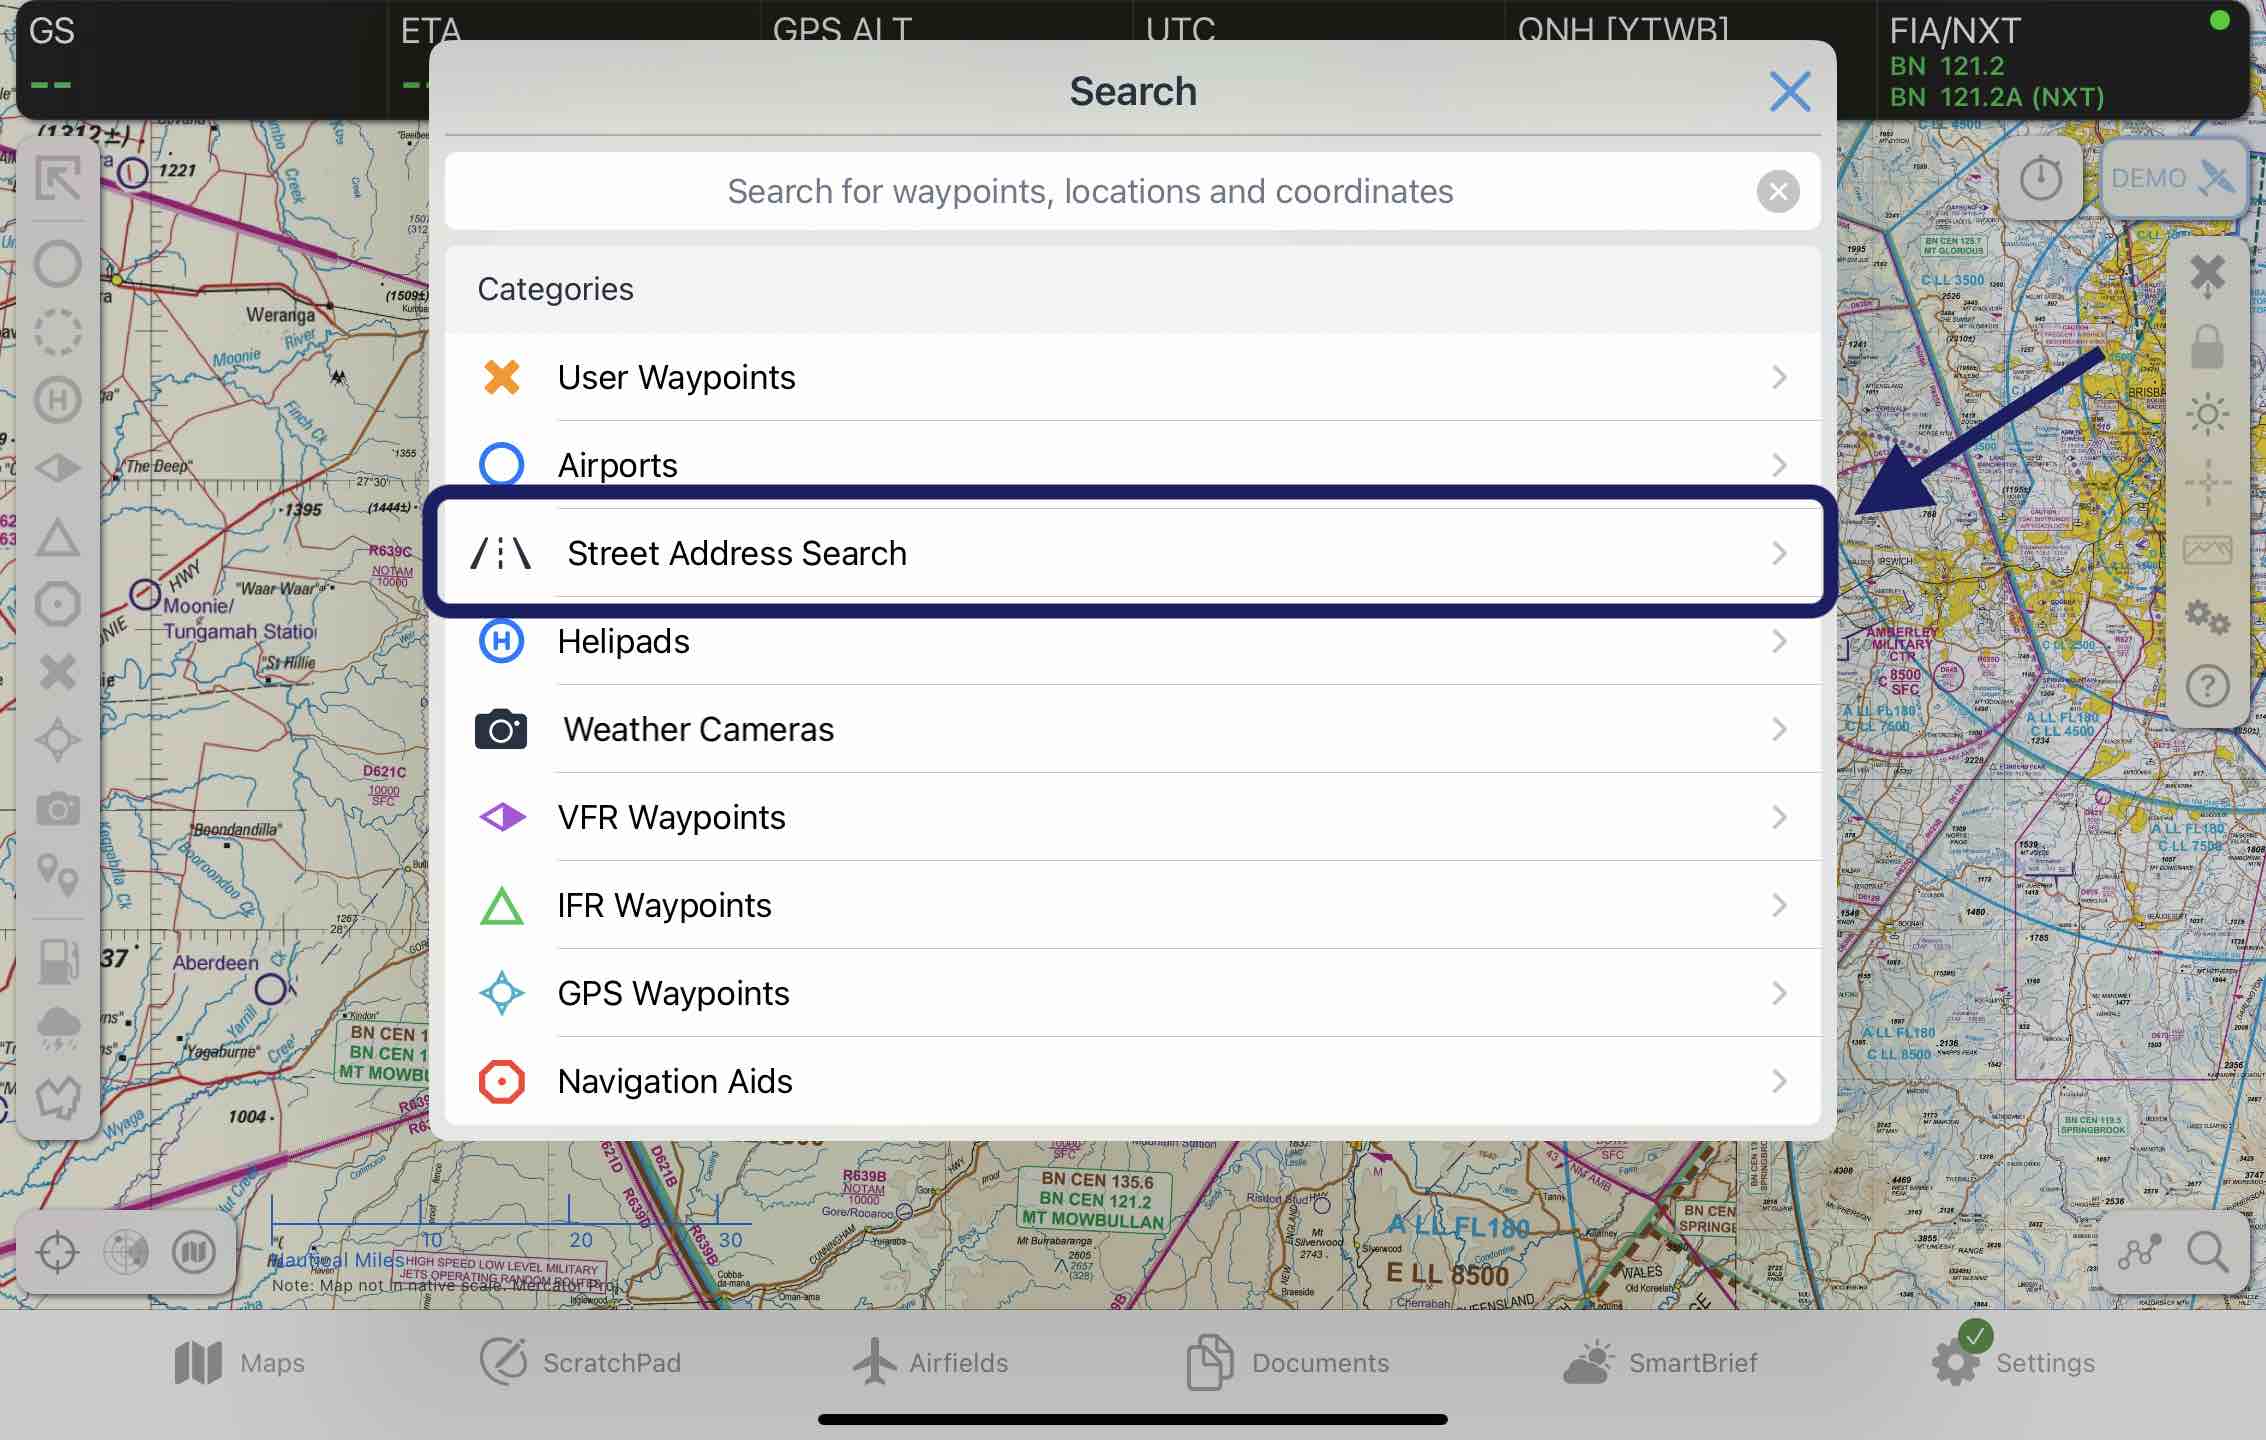
After tapping on Street Address Search type the desired suburb or select from the list, followed by street name, and finally number.
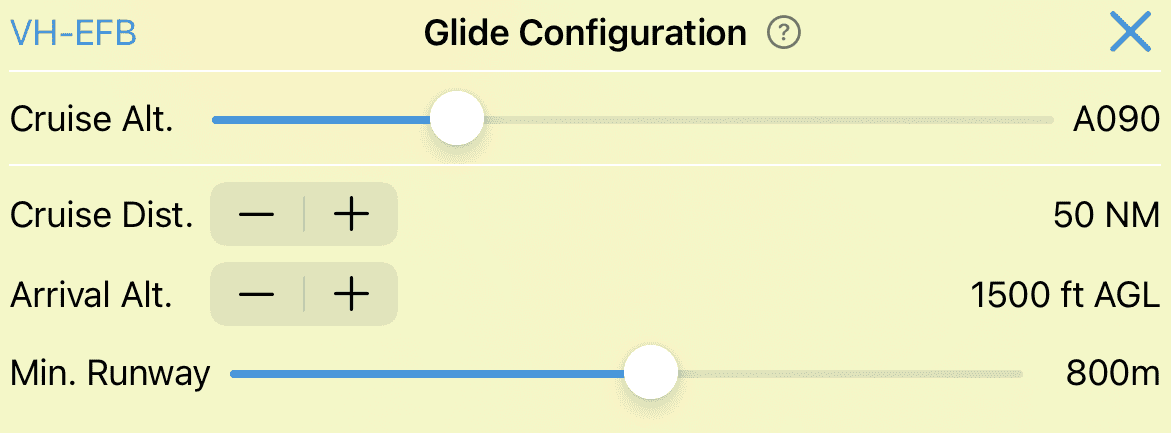
18.5. Glide Assistant
Note
This feature is in Beta and might not be available to you.
The Glide Assistant feature comprises of two features - a planning tool for PSEA (Australia) and SEIFR (New Zealand) operators, and a Real Time glide tool. This is enabled from the ‘Map View Options’.
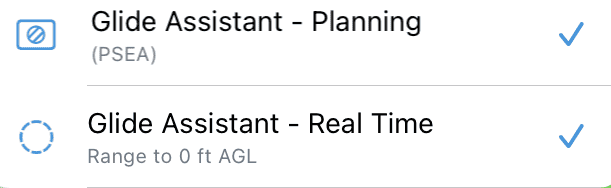
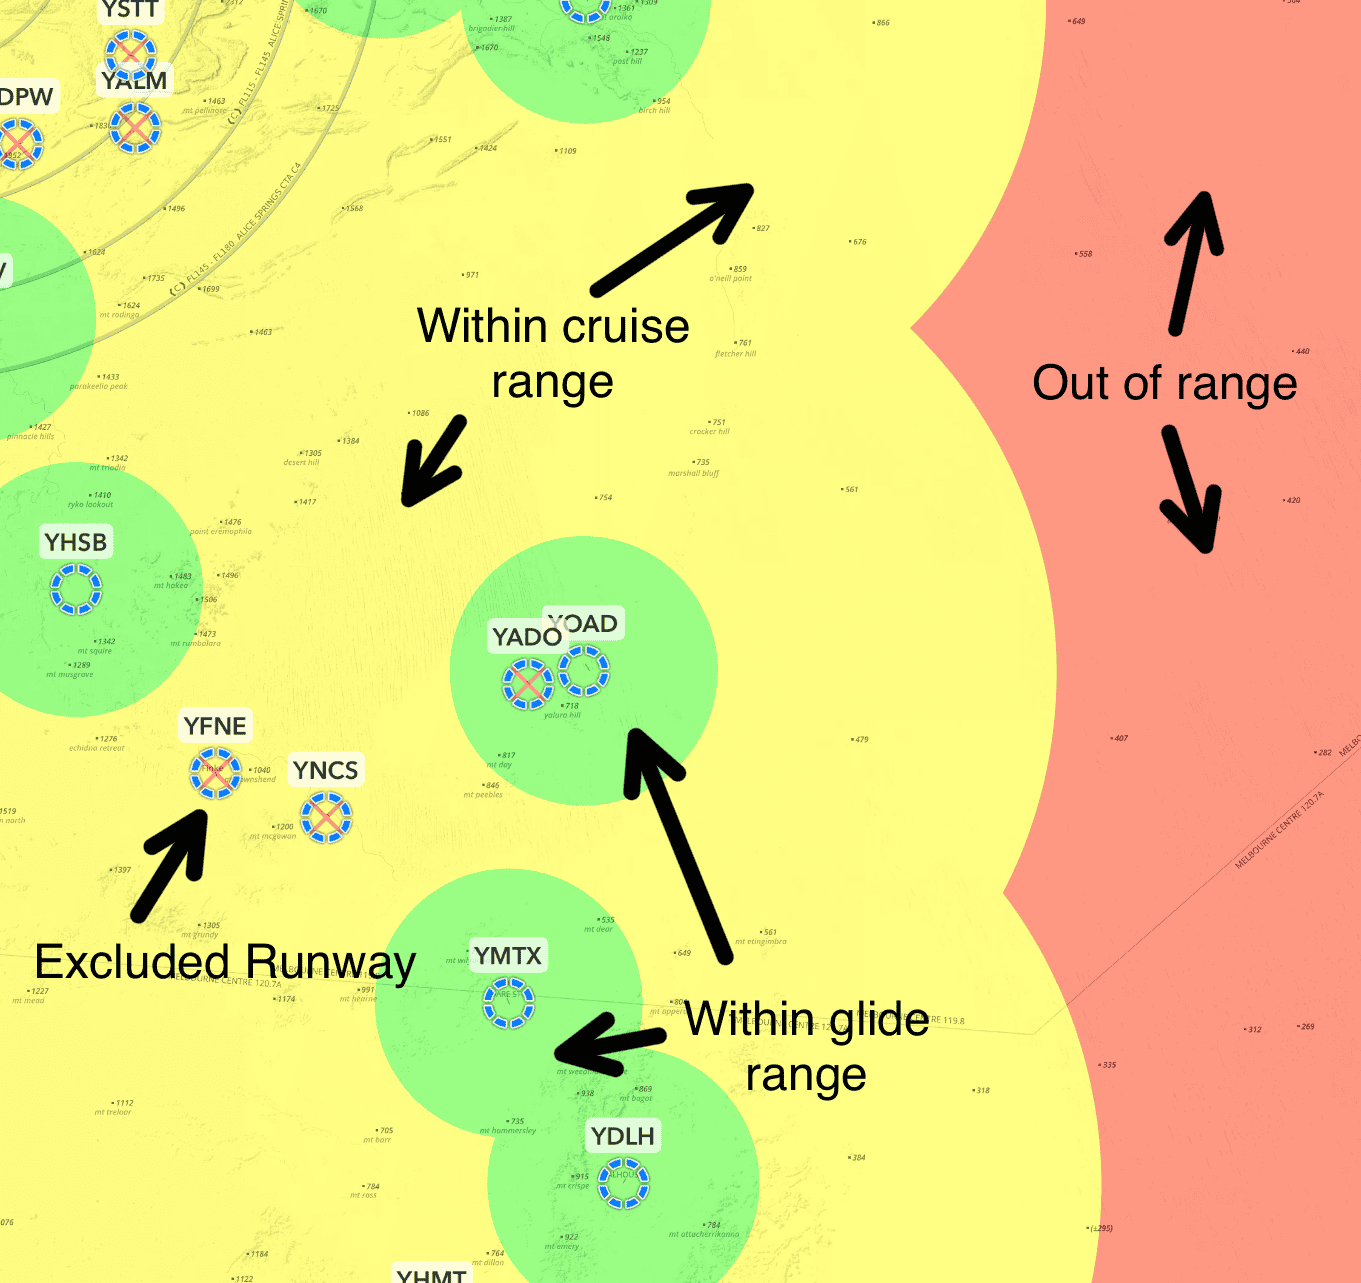
Real Time Glide Tool
The Real Time Glide Tool shows your glide range to ground level. It only activates when above 1,500 ft AGL and uses your current active Aircraft profile’s Glide TAS and Glide Ratio figures. If you have any issues, first check Settings → Aircraft to ensure the correct figures are entered. Real Time glide range corrects for wind by using the GPWT profile wind half way to the ground. For example if you are cruising at 14,000 ft AGL it adjusts your range based on the winds at 7,000 ft.
Warning
The winds used are based on forecast winds. Actual conditions may differ, so use with caution.
PSEA/SEIFR Planning Tool
The PSEA/SEIFR Planning tool shows the nil-wind planning range to suitable landing points along your route. The pilot can make adjustments to the figures. If the Enterprise Dashboard module is activated for your Organisation, some figures will use the company policy and not editable.